
This article contains affiliate links. In other words, if you click on an affiliate link and buy a product, this blog may receive compensation at no cost to you. See our full disclosure here.
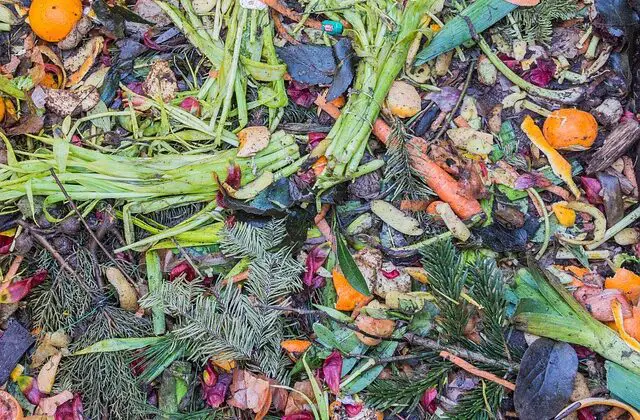
Composting is great for the environment and your plants! It conserves water, reduces weeds, improves plant quality, and more! But – is it possible to compost during the winter? The answer is yes! Even in a cold weather area, you can compost your food scraps year-round.
And we’re here to help you do just that!
So, don’t let winter stop you from continuing to compost or even starting a compost bin. Read on for more on composting in winter, including the top tips to keep it going during cold months.
Table of Contents
- Can you compost in the winter?
- Composting in winter: Top tips for keeping your compost going during colder months
- Books on composting*
Can you compost in the winter?
Yes, you absolutely can! Micro and macro-organisms break down your kitchen scraps. And many of them work year-round; they just work much more slowly during colder months.
Your compost pile is full of life, from the insects and worms you can see to the micro-organisms you can’t, like bacteria and fungi. Most of these organisms work harder when temperatures are warmer.
Even when the temperatures plummet, many still do their job, only more slowly. But you can do things to keep them warmer and work a bit harder so you can keep composting all year long!

Composting in winter: Top tips for keeping your compost going during colder months
• Remove finished compost.
If you’re using the same compost bin year-round, first remove finished compost to make more space for winter materials. Go ahead and spread the finished compost in the garden, or put it into separate containers so it’s ready in the spring.
• Collect leaves.
Fall leaves are one of the most essential ingredients for winter compost, so having a nice pile of leaves near your bin makes things easier. You can pile them around your bin or keep them in nearby bags or containers.
You can also use the collected leaves to insulate around your bin and layer as you add fresh compost, leading to the next tip…
• Layer leaves with fresh compost.
As you add to your compost bin, create layers of fresh (green) compost alternated with brown leaves or other brown material. The brown layer helps reduce odor, absorb extra moisture, provide carbon, and aid airflow. In other words, it’s essential to healthy compost.
If you didn’t stockpile leaves in the fall, use woodchips, pine needles, sawdust, straw, peat moss, or shredded paper.
If spring rolls around and you don’t layer in any brown materials all winter, go ahead and mix them in whenever you can.
• Use smaller food scraps and freeze them first.
Fresh compost breaks down faster when it’s smaller. Cut your scraps into smaller pieces during the winter to speed up decomposition. Further, you can crush your leaves into smaller pieces to help out.
Freezing your scraps in large food storage bags keeps fruit flies away and helps them dry out a little. Just keep a bag in your freezer and add scraps as you have them, then empty the frozen scraps into the bin when full.
• Insulate your compost bin.
Insulating your compost pile isn’t mandatory for winter composting but will keep it warmer. And the warmer it is, the more active the organisms are, so the more it will break down over the winter.
Surround your bin with leaves or straw bales, and/or cover it with a tarp to help keep it warm and active during cold weather. You might also consider a compost bin designed for winter.
• Keep a large compost pile.
Large compost piles with more material stay warmer in the winter – encouraging more decomposition than smaller piles.
• Don’t stir
The less you stir, the warmer your compost pile will be. For most compost bins, waiting to turn your pile until the weather gets warmer in the spring is best. This will help keep the compost more active.
• Check for moisture
Balance is the key when it comes to moisture!
If your bin gets too dry, add a little water to help it along. The decomposition process requires moisture, so nothing will happen if it’s too dry.
Too much moisture isn’t good either. If you have a soggy compost bin, add more leaves (or other brown materials) and stir your pile to help with the excess moisture.
• Consider a separate winter bin (or a worm bin)
Our compost bin is near our garden – which is away from our house – making it inconvenient during winter weather (especially when the snow is deep).
So, if you’re like us and your compost bin is far from your house, consider a separate winter bin closer to home. That way, you’ll still compost even when you can’t or won’t brave the winter weather.
Keep a smaller, more convenient compost bin in your kitchen, garage, or outdoors near your house during the winter. Then, add it to your regular compost pile in the spring.
A plastic tote, garbage can, or other large container with a lid will do the trick. If it’s outdoors, you’ll also want to ensure it’s critter-proof.
You’ll still want to add brown layers to your smaller bin when possible. But if you can’t, mix browns in whenever the circumstances allow.
Worm bins are another great winter composting option! It requires more monitoring to ensure a healthy bin and worms. Read up on worm bins beforehand to set yourself up for success.
Composting in winter is not only possible, it’s recommended. It’s a fantastic way to help the environment and create healthy soil for healthy plants!
Books on composting*
- Let It Rot!: The Gardener’s Guide to Composting
- Worms Eat My Garbage
- Compost Everything: The Good Guide to Extreme Composting
Read next:
- Winter Gardening in the Midwest? Calendar for Winter Garden Tasks
- When To Start Seeds Indoors in Iowa: Get a Head Start on Spring
- Winter Sowing Seeds: List of best seeds to winter sow
- Gardening Gifts For Dad: 10 Gifts He’ll Love
*Amazon links