
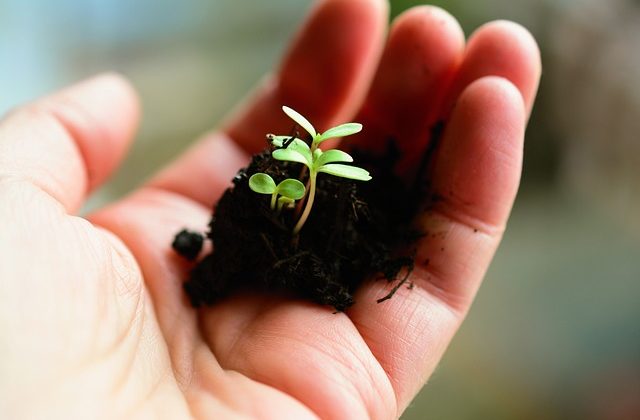
Winter sowing is super simple and an excellent way to start seeds! Not only is it easy and fun, but it’s a cheap way to start seedlings. Below we’ll talk about the benefits of winter sowing seeds, which seeds work best, and how to get started!
What is winter sowing?
Winter sowing means starting seeds outdoors in containers during the winter months – and allowing them to germinate outside in the spring.
Why winter sow?
There are many (many!) great reasons to winter sow seeds!
- Starting seeds outdoors in the winter simulates mother nature. Many seedlings are hardier when subjected to winter temperatures–just like they would if they sprouted naturally outdoors.
- Saves space in your house. Not having to find space indoors for seedings is a considerable benefit. And that also means you won’t need grow lights or seedling trays.
- Seedings are hardier. As long as you harden them off by removing the lid of your container for at least a week before transplanting, they’ll already be accustomed to the outdoor temperatures and weather.
- You can transplant sooner. Since seeds germinate and grow on a natural timeline, you don’t have to worry as much about planting too soon.
Winter Gardening in the Midwest? Here’s a Calendar for Winter Garden Tasks
What seeds to sow and when
You can winter sow almost any seed suitable for your zone, but some need to be started later than others. If you time it according to how cold-tolerant they are, you’ll enjoy winter sowing success!
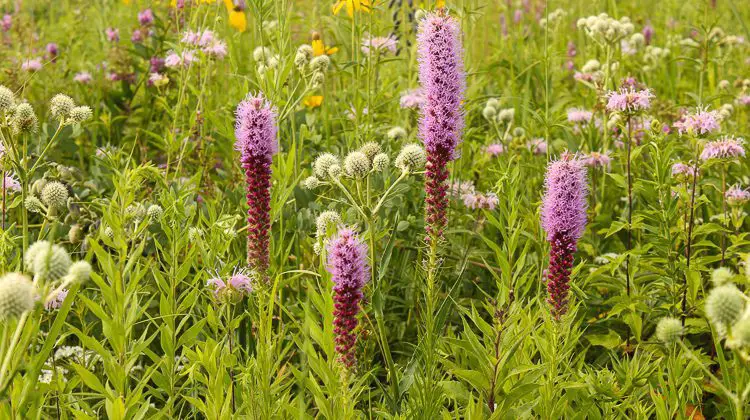
Many native perennials, cold-tolerant plants, and seeds that need cold stratification (exposure to cold temps to germinate) are a good bet. And most seeds that can be direct sowed in the soil outdoors during the spring or fall do well with winter sowing.
It’s also possible to use the winter sowing method for warmer-weather seeds, like peppers and tomatoes. But they must get started closer to the last frost date and be monitored more closely.
Seed packets can help you decide when to start the process (or Google it!). Some seeds need longer to germinate and can tolerate more exposure to cold temps than others.
- Seeds that need cold stratification to germinate, like Yarrow and Milkweed, can get sowed 3+ months before spring.
- Cold-tolerant plants, like broccoli and spinach, can get sowed around two-three months before the last frost.
- And seeds that need warmer soil temps, like Lavender or Sunflowers, should get sowed close to the last frost date.
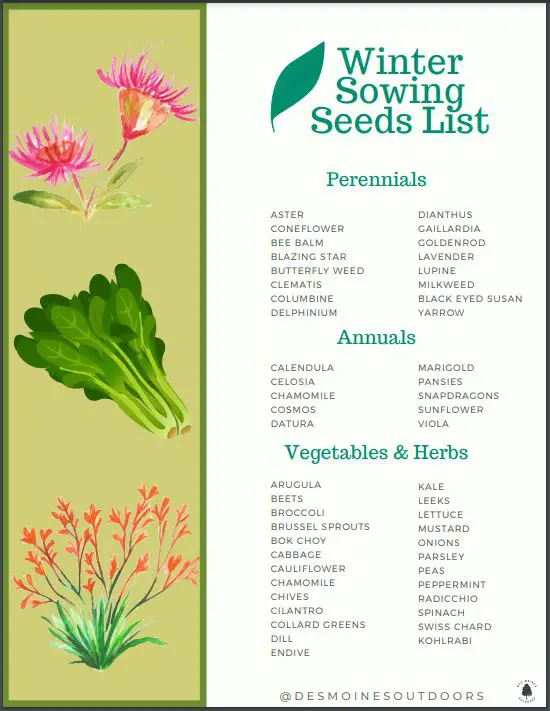
Winter sowing seed list
Here is a list of seeds to consider for winter sowing. Scroll down for a free printable list!
Note: We haven’t personally tried winter sowing all seeds listed. For best results, we recommend sticking to cold-hardy varieties.
Perennials
- Aster
- Coneflowers (Echinacea)
- Bee Balm
- Blazing Star (Liatris)
- Butterfly Weed
- Clematis
- Columbine
- Delphinium
- Dianthus
- Gaillardia
- Goldenrod
- Lavender
- Lupine
- Milkweed
- Rudbeckia (Black-eyed Susan)
- Yarrow
Annuals
- Calendula
- Celosia
- Chamomile
- Cosmos
- Datura
- Lavatera
- Marigold
- Morning glory
- Sunflower
Vegetables & Herbs
- Arugula
- Beets
- Broccoli
- Brussel sprouts
- Bok choy
- Cabbage
- Cauliflower
- Chamomile
- Chives
- Cilantro
- Collard greens
- Dill
- Endive
- Kale
- Leeks
- Lettuce
- Mache
- Mustard
- Onions
- Parsley
- Peas
- Peppermint
- Radicchio
- Snap peas
- Spinach
- Swiss chard
- Thyme
- Kohlrabi
How to winter sow seeds
Winter sowing is super simple! Basically, you’re creating a little greenhouse for your seeds.
And you can get started with a few basic supplies – many of which you already have at home.
What you need:
- Clear or transparent food-grade containers with lids. (Choose ones that you can add holes for drainage and hold at least 4” of soil, with headroom for seedlings.)
- Quality potting soil
- Labels, permanent marker, or paint pen
- Seeds
- Duck tape if using jugs and other tall bottles
Instructions for winter sowing:
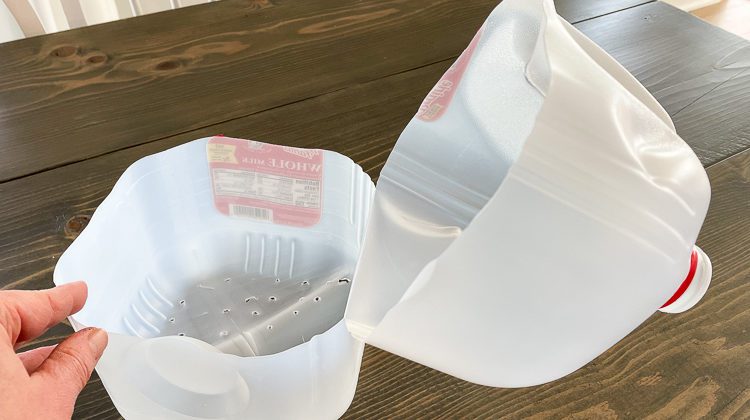
1. Find jugs and containers. Collect milk and water jugs, two-liter bottles, take-out containers, lettuce/salad containers, ice cream tubs, and other clear or transparent food-grade containers.
2. Clean your containers using soap and water. Some containers can get cleaned in the dishwasher.
3. Prep the containers.
- Once clean, poke or drill holes in the bottom of your containers for drainage.
- Cut milk jugs and tall bottles in half with scissors.
- Put vent holes in the lids of take-out or salad containers to allow airflow and moisture to get inside. No need to do this with jugs, just leave the cap off.
4. Add potting soil to containers. Fill the containers with at least four inches of potting soil (water it if it’s dry).
5. Plant the seeds at a depth according to the instructions on the seed packet. If you space them out when planting, there’s no need to thin them. But if you use many seeds close together to ensure germination, you’ll need to thin the seedlings later.
6. Label containers. Many seedlings look very much alike. So, it’s best to label your containers clearly. Or put plastic markers into the soil. It’s also good to mark the bottom of the containers in case the sun fades your label.
7. Water the seeds. Before you put the lid on, water well and let it drain before you put it outdoors.
8. Put the top on the containers. How you do this depends on the containers you’re using. For jugs and bottles you cut in half, put the top back on with duck tape (& leave caps off). Make sure other containers have vent holes in the lid.
9. Place containers outside. Make sure you put them where they will get rain & snow and, of course, lots of sunshine. But keep them in a spot where they won’t get blown over by the wind.
10. Water once they germinate. Once you see those little seedlings pop through, ensure they stay moist. If it doesn’t rain, you need to water them.
11. Make sure they don’t get too warm. When the sun is strong and temps start to climb, keep an eye on your little greenhouses so seedlings don’t overheat. On warm days, you might have to remove the tops during the day. Just make sure they’re protected from harsh or cold weather.
12. Harden off seedlings. A week or two before transplanting, take the lids off and acclimate seedlings to direct sun and light wind (if you haven’t already). Start with shorter times and gradually leave them out all day.
13. Transplant seedlings. When your seedlings are big enough, you can transplant them directly into the garden. Since they started outdoors, they’re sturdier and acclimate better than those started indoors!
Winter sowing is super simple and a great way to start seeds! But, it may take some trial and error to perfect your method. If you’re like us, we learn more about gardening each year – and our garden gets even better yearly.
Next: